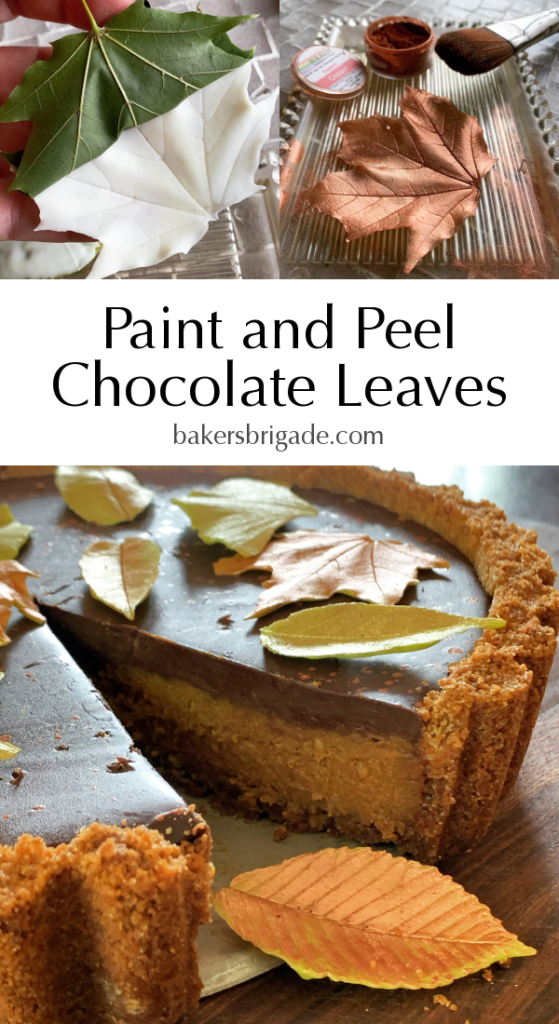
Winter will be here before we know it. Stock up on these quick and elegant paint and peel chocolate leaves now while there are tons of fresh and lovely leaves everywhere you look. I’m going to make a bushel basket full of these chocolate maple leaves to use throughout the fall on my special desserts. They keep well in an airtight container for several months, so feel free to really go crazy on these!
Kitchen Witchery
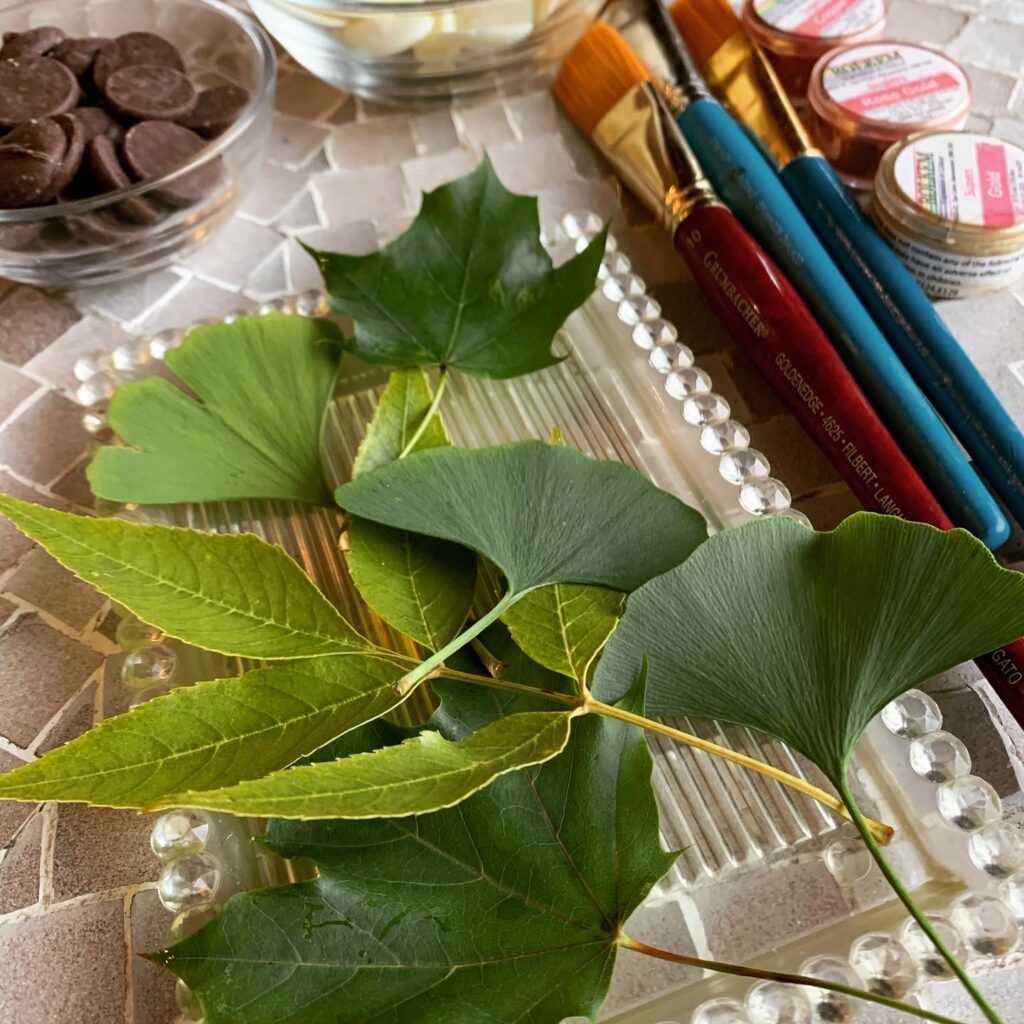
In today’s edition of “Here’s Something Neat!” I’d like to show you a super easy way to get show-stopping chocolate leaves for decorating cakes, tarts, pies, etc. Want your friends to think you’re a kitchen witch? All you’ll need are some clean, dry leaves, a paintbrush and some chocolate. If you’re feeling extra fancy, you’ll need some edible luster dust too.
We Eat With Our Eyes!
I’m somewhat obsessed with the idea that you should be able to see what flavor something is by looking at it, or at least get an idea. Maybe it’s because I largely share my baking through photos and they say we eat with our eyes…but if something is strawberry flavor, I’m of the opinion it shouldn’t be purple. It should be pink or red (like these chocolate-covered strawberry cupcakes). I often add a touch of food dye to enhance the visual appeal, I swear it makes the flavors taste stronger!
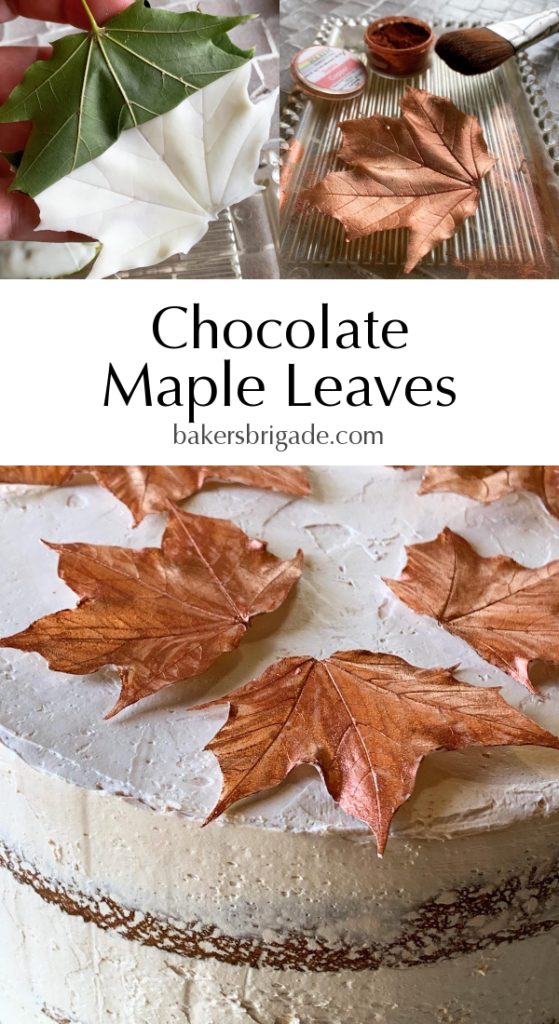
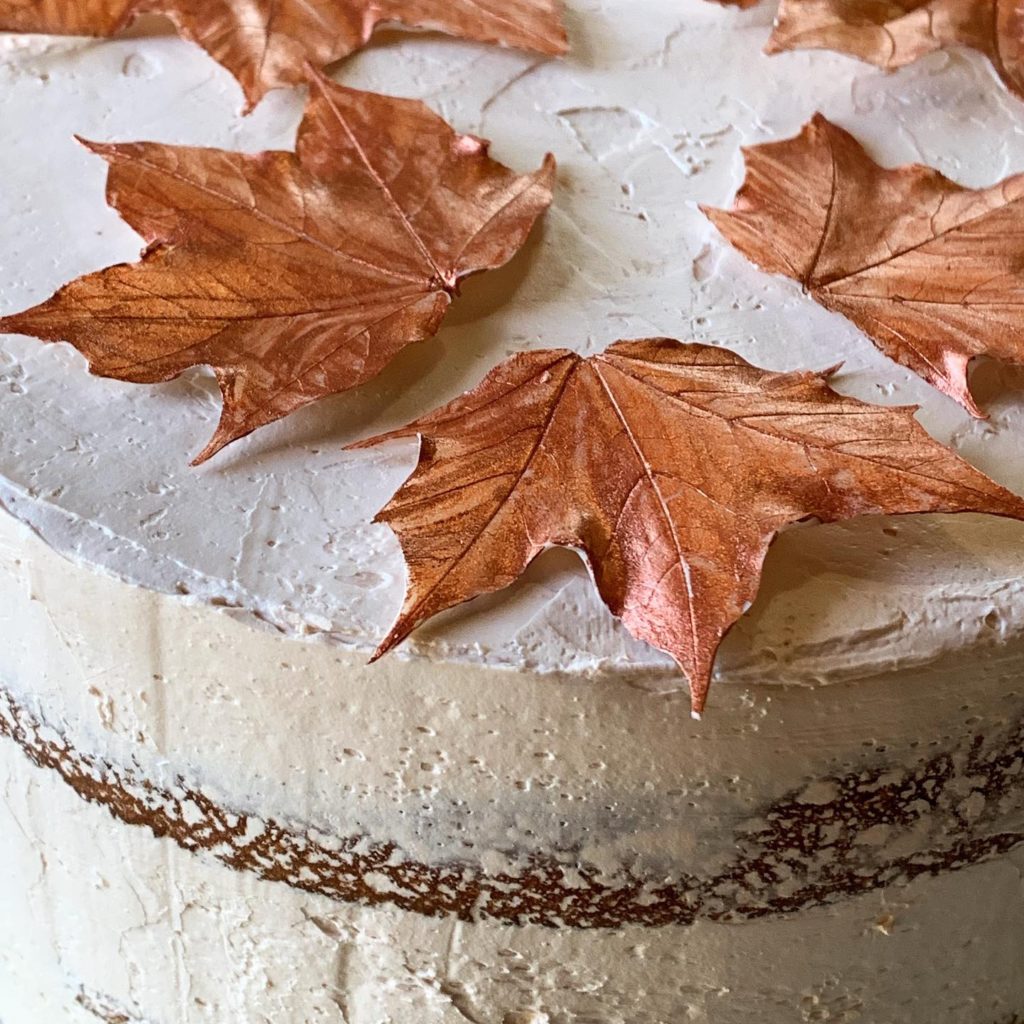
Chocolate Maple Leaves
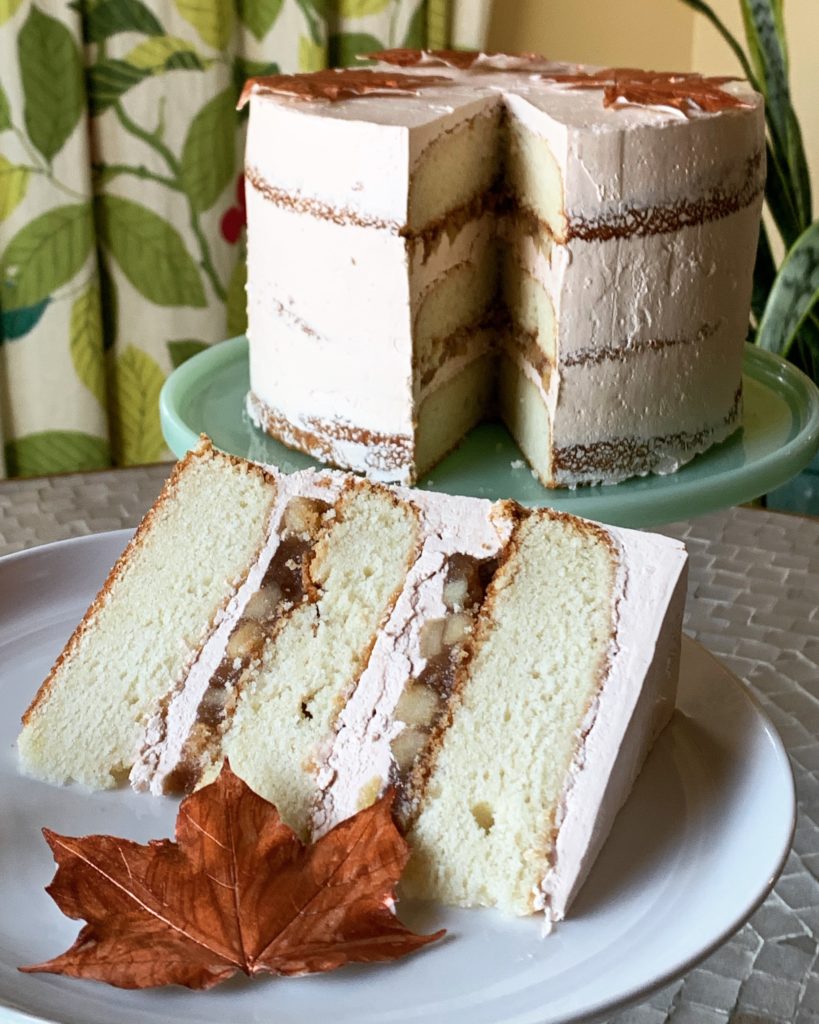
So when I got it in my head that I was going to make a maple apple cake, I started wondering how I could SHOW the maple flavor. I didn’t want to pour syrup on it! Maple sugar just looks like turbinado sugar. That’s when I started thinking about chocolate maple leaves. I happen to have a Norway Maple in my front yard so I headed out and grabbed a few tidy looking ones. I washed and dried them, then got started.
Pick Your Chocolate
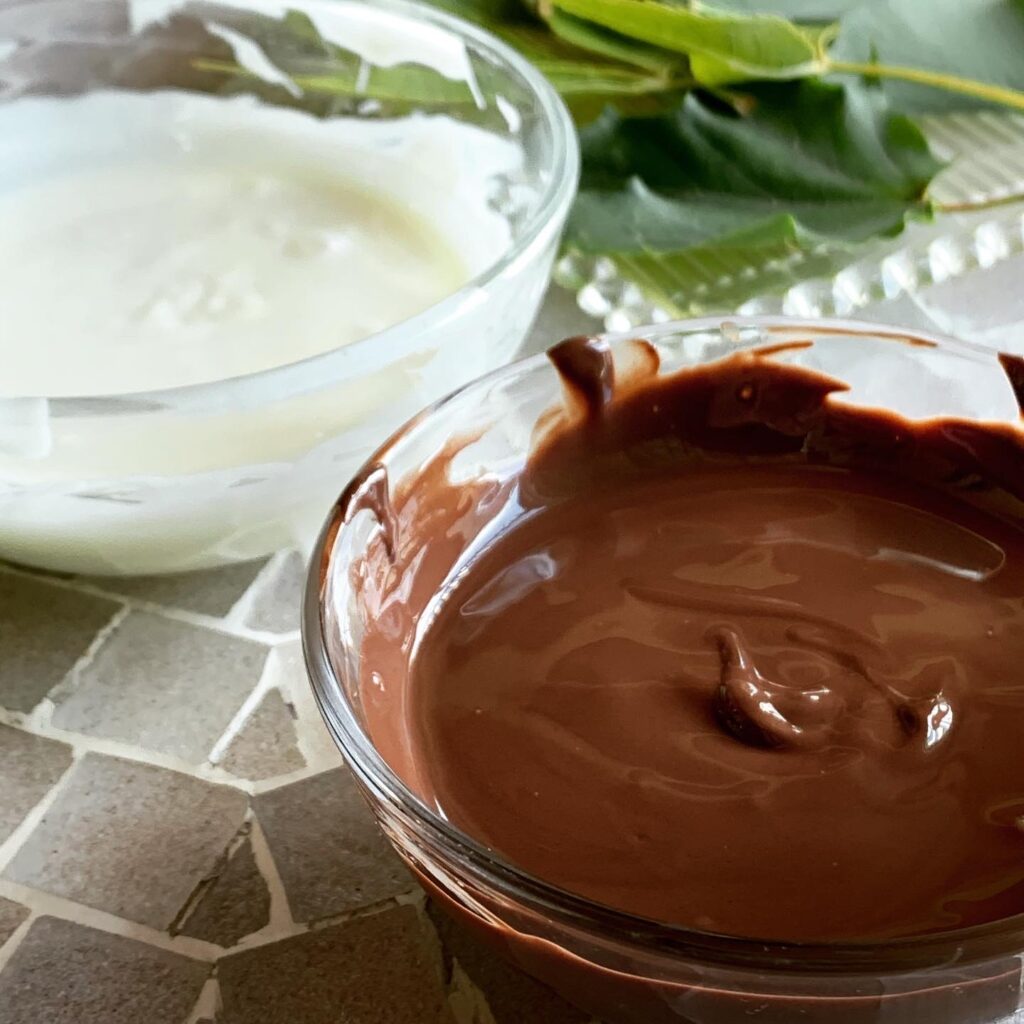
You can use any type of chocolate for this. Anything that melts smoothly and sets up firm when cooled off is great for this. I’ve used chocolate chips, candy melts, real chocolate and white chocolate. They all perform admirably. Grab a few ounces of chocolate, you don’t need much, and melt in a double boiler or by microwaving for 15-30 seconds at a time, stirring between each interval.
Forget Precision
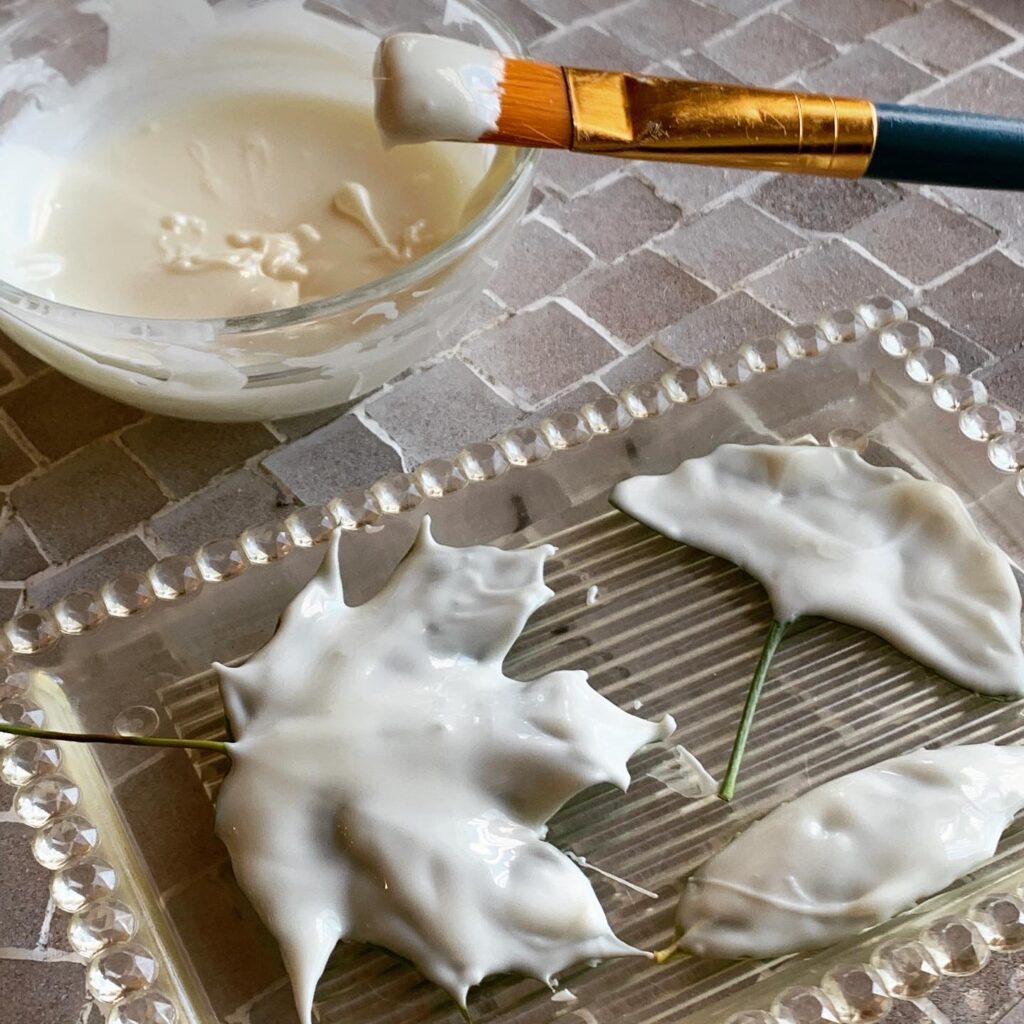
The results are so pretty, I bet you’re wondering if this is one of those fiddly projects that only baking bloggers with time to kill and make work. I swear this is not going to be one of those “Nailed It!” moments. My daughters did this project with me several times and got the same results I did. No offense to them, they’re great little bakers. But I’m saying it doesn’t much precision to get this done right. In fact, a bumpy, lumpy, thick coat of chocolate on the back of your leaf will make it extra sturdy! So get any old paint brush that is clean and DRY (any moisture could make your chocolate seize up and get grainy), then paint your melted chocolate onto the back of your leaves, going all the way to the edges and trying not to get any chocolate on the front of the leaf. You want to paint the back so that when you peel off the leaf, you will get an impression that looks like the top of the leaf.
Smooth Leaves Only!
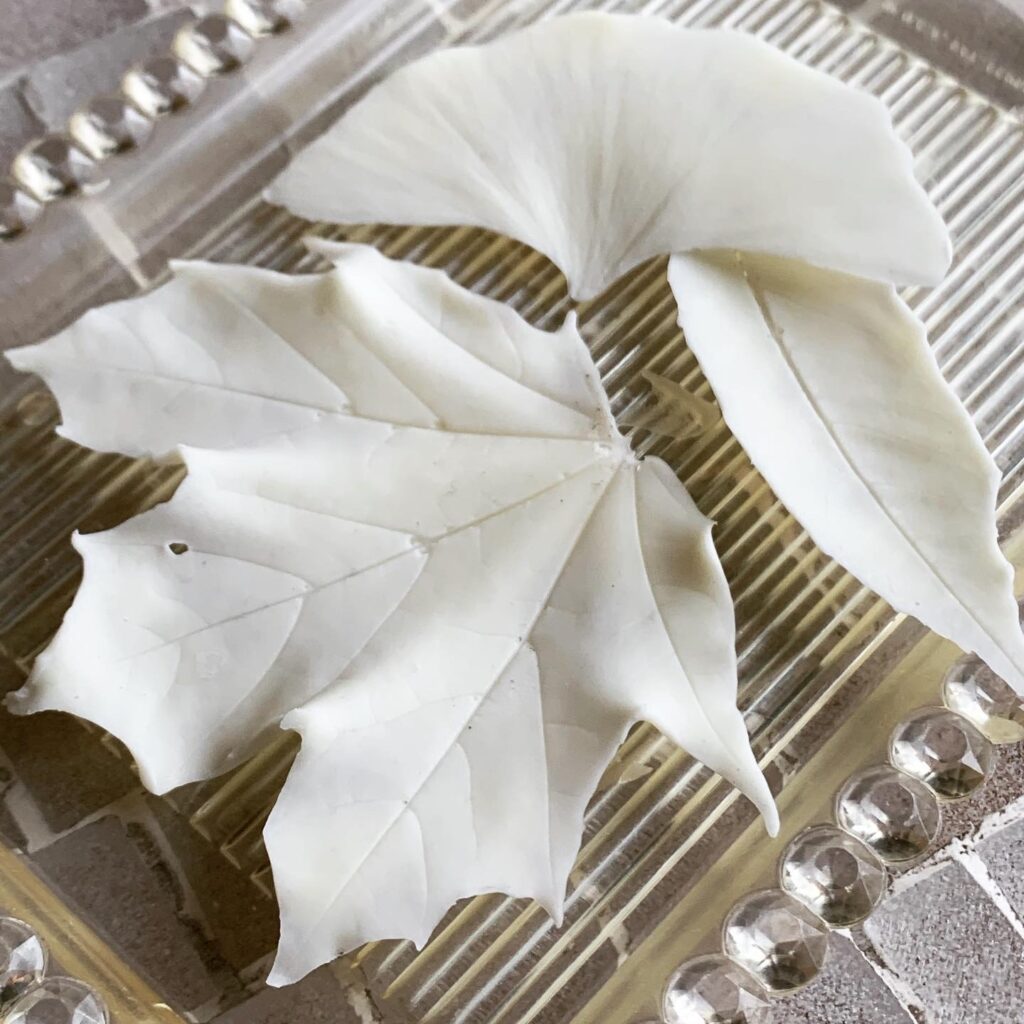
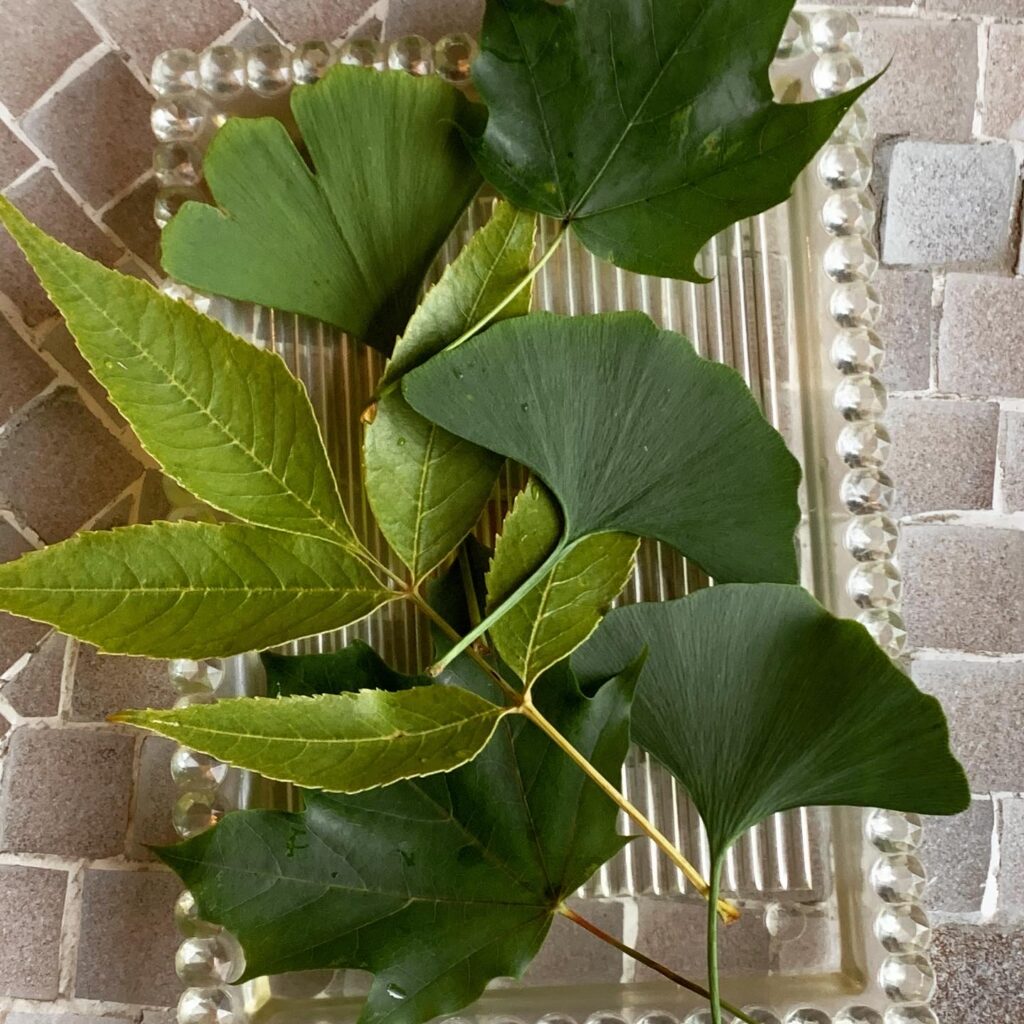
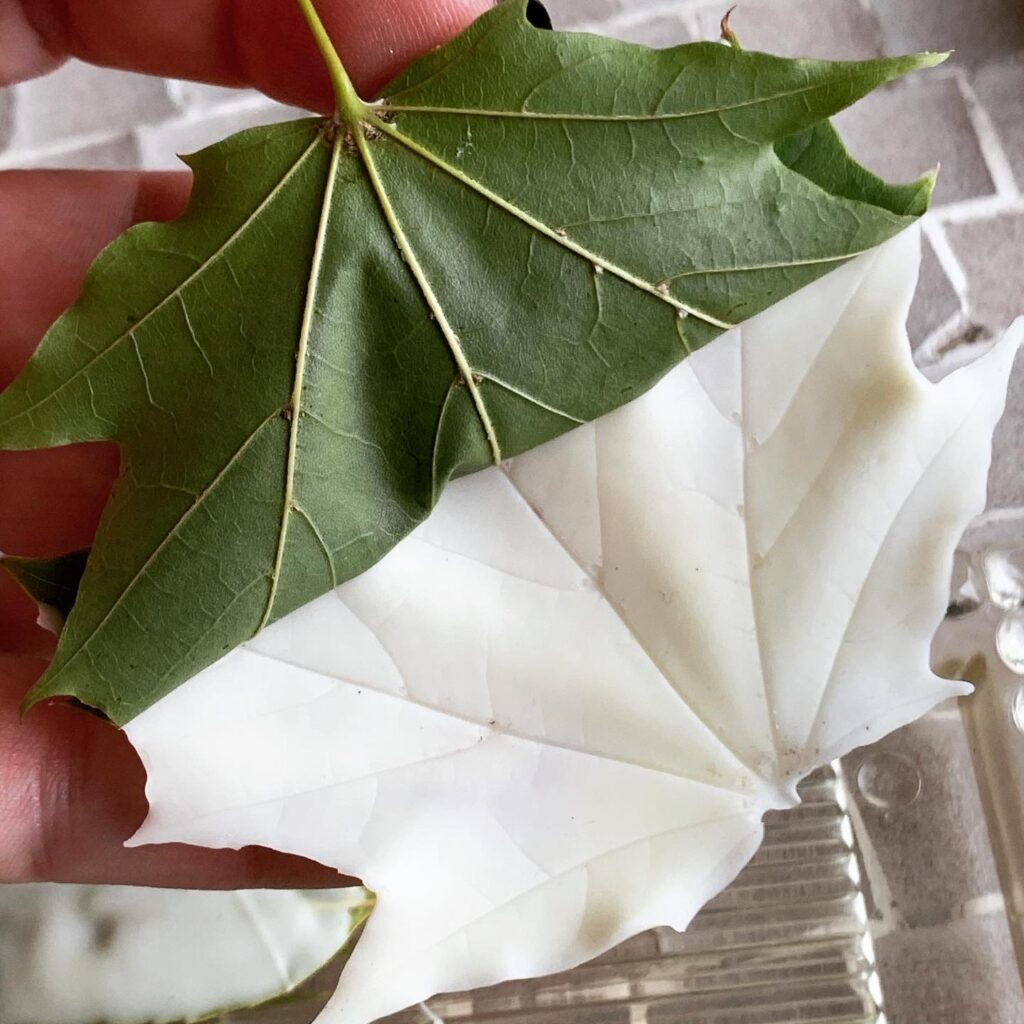
You can use any smooth-backed leaves for this project. I’ve had luck with ash, elm, linden, maple and gingko. The only failures I’ve had are when I try to use a leaf with a fuzzy backing. I found some beautiful glossy oak leaves (which probably would have been gorgeous on a cake as is) but the fuzz on the back of the leaves stuck to the chocolate and it just wouldn’t release cleanly. With a smooth leaf, it takes just a few minutes to make an edible work of art! Put your painted leaf in the fridge or freezer until the chocolate hardens and then slowly peel the leaf off, starting at the petiole (the stem thing at the base of the leaf). Don’t worry if a little tip of chocolate breaks off, just adds to the charm. If your leaf completely falls apart,
Gilding the Lily
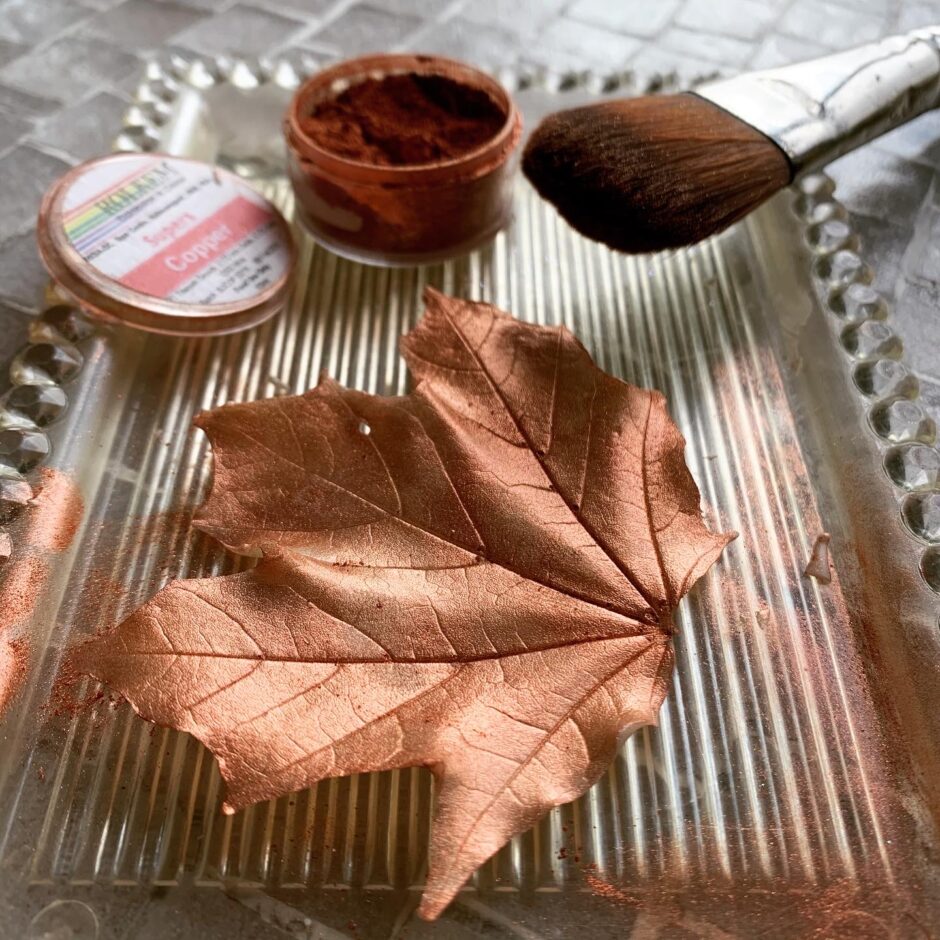
Leaves are pretty beautiful just on their own. But if you’d like to add a little color or shine, you can use edible luster dust. I have rose gold, rose gold
, and copper
dusts by Rolkem, but if you can’t find that, this set
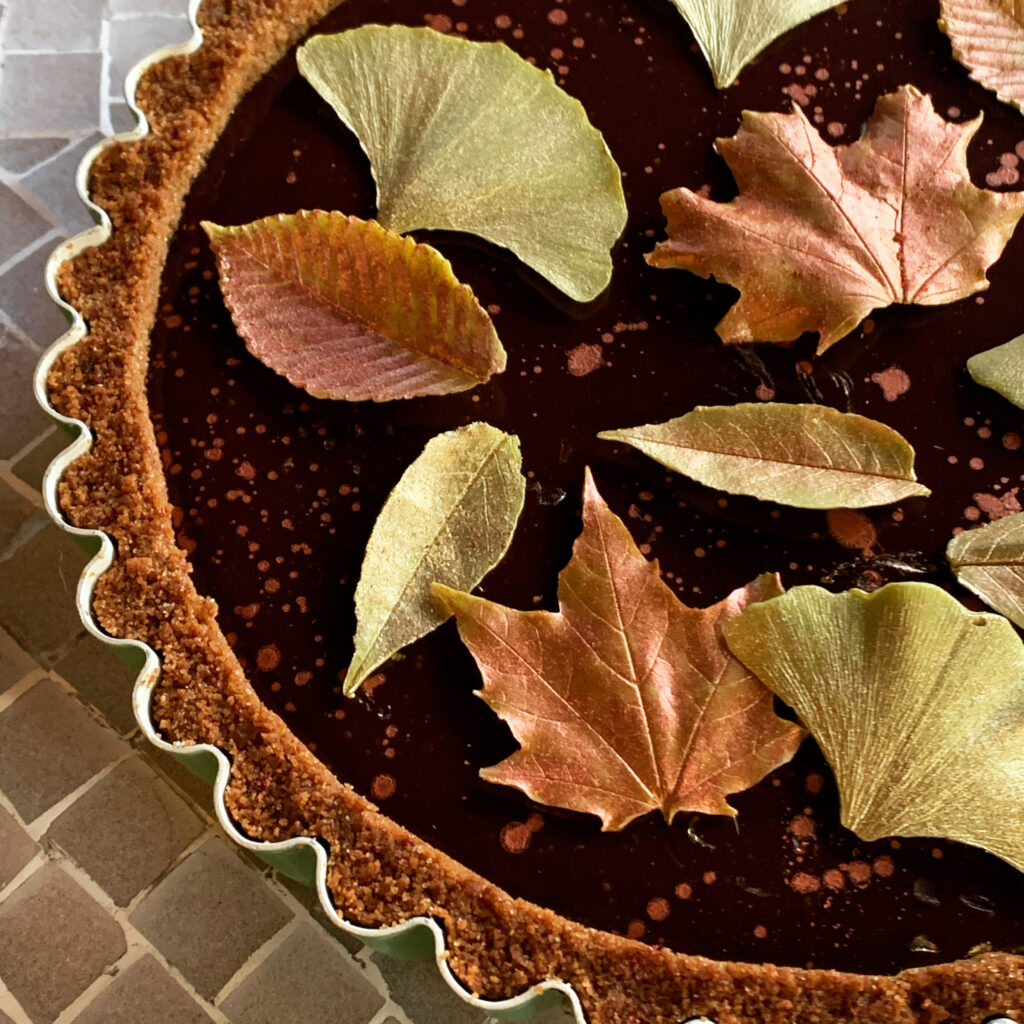
from Amazon is pretty close. You can also use the dusts by Wilton, which you can find at Michael’s, but I think the colors are not quite as rich and metallic. Getting a few colors and mixing it up can be nice, I think the mix looks great on this Pumpkin Pie with Chocolate Ganache.
Adding The Luster Dust
Sometimes when using luster dust, your best bet is to make a paint with some almond extract or vodka. For these paint and peel chocolate leaves, all you need to do is dip the brush in the dry luster dust and apply it to the chocolate. The oils in the chocolate will grab onto the dust and make a nice even coating. Just sweep it on until you get the desired intensity. It’s a lot like applying eye shadow!

Step by Step Directions
- Pick your leaves. Clean and dry leaves are best. Most leaves will keep in the fridge, in a ziplock bag, for about a week. Don’t use leaves with a fuzzy back, they will be difficult to remove from the chocolate when the time comes.
- Melt the chocolate. Any chocolate or candy melts will do. Chocolate chips work fine. Heat in a double boiler or in the microwave by heating in 15-30 second increments, stirring at each interval until smooth and completely melted.
- Paint the backs of the leaves with melted chocolate. A nice thick coating will be the sturdiest. Make sure your brush is completely dry so your chocolate doesn’t seize. Set the painted leaves on a piece of wax paper or any flat tray.
- Let the chocolate cool and harden. You can do this with a few minutes in the fridge or freezer. Cooling them off helps the leaves release easily from the chocolate and makes them less likely to melt from the warmth of your hands as you handle them.
- Peel the leaves from the chocolate. Start at the petiole (the stem thing at the base of the leaf). Be gentle, but work with confidence. You want to peel the leaf off before the warmth of your hands melts the chocolate. If your leaf breaks, it’s likely your chocolate wasn’t thick enough.
- If desired, coat the leaves with metallic luster dust. No need to add any liquid, just brush the dust on dry, as if you are applying eye shadow.
- Leaves will keep at room temperature in an airtight container for a few months.
More fall and foraged treats from Bakers Brigade:
- Maple Apple Cake with White Chocolate Leaves
- Cranberry Curd Tart with White Chocolate Mousse
- Pumpkin Pie with Chocolate Ganache
- Dark Chocolate Tart with Espresso Whipped Cream
- Bourbon Butterscotch Pie with Molasses Whipped Cream