
I don’t usually dress up for halloween. There was a Bridezilla costume in 2014 that involved a thrift-store wedding dress, blond wig and a t-rex mask, but that’s the exception, not the rule. But I love making Halloween cookies. The kids always get really into it and it’s the project that reminds me that all the fun holiday baking is just around the corner. I usually try to keep things simple, using the same basic sugar cookie recipe I use for all of my holiday-themed cookies (like these bunnies). These don’t require any piping tips or fancy techniques, you can make them with supplies from your grocery store’s baking aisle.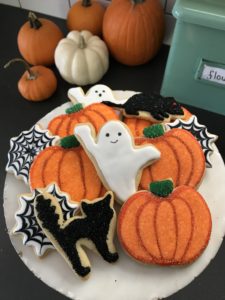
This year I decided to make ghosts, spiderwebs, glittery cats and creepy rats. I liked the simple black and white color palette, which incidentally made decorating much easier and more straightforward. If you want to get fancy and make the pumpkin cookies in these pictures, never fear. The recipe and directions are right here!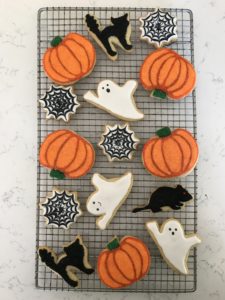
These cookies don’t require any fancy piping tips or bags, just the Betty Crocker cookie icing and an edible food marker, both things you can buy in the baking aisle. I know you probably think you don’t have the time or creativity or whatever to decorate Halloween cookies, but I really think you do. I have a lot of little tricks to make it easy and pretty foolproof:
- Don’t try and do it all in one session. The cookies actually turn out better if you let the dough sit overnight in the fridge and the cookies dry out in a container on your counter for a few days. It’s also just less overwhelming to do one stage at a time. I usually make my dough 2-7 days before I need the cookies. I do dough one day, bake the cookies another day and decorate them on a third day. Doing it this way you also get the bonus smugness of feeling like your life is organized and under control.
- Skip the royal icing. It’s really tricky to get the consistency right if you’re inexperienced. When I make royal icing I actually get out a timer and count how many seconds it takes for the drizzled icing to get smooth, then adjust it by adding infinitesimal amounts of water with a spray bottle. You don’t want to do that right? Betty Crocker cookie icing can be found in the baking aisle of most major grocery stores. It comes in a range of colors (look for the black and orange in your seasonal aisle along with the Halloween decorations and chocolates) and sets up hard like royal icing so you can put them in treat bags or stack them. It comes with a piping tip attached that you can cut to make any size line you like. It also tastes pretty darn good! I actually prefer it to royal icing, it’s more like a corn syrup glaze.
- Keep your decorations simple. Do one design for each shape you cut out. It may seem boring but the consistency will make it look more “professional”. And lots of designs are deceptively hard to make look good. I know because I’ve tried and failed many times.
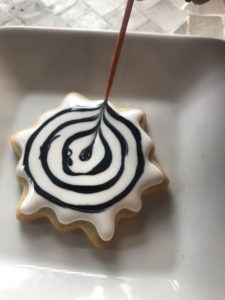
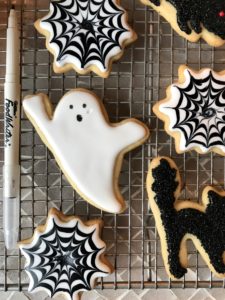
- If you’re making spider webs, frost the entire cookie white, put a black dot in the center and three concentric circles around that. While the icing is still wet, drag a toothpick from the center of the cookie to the edge all the way around. I use a cutter that has twelve points, but a circle would work too.
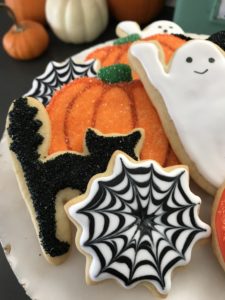
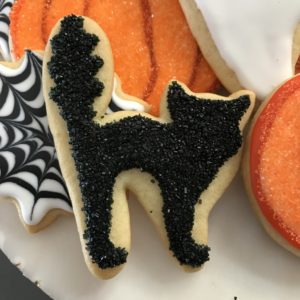
- If you’re making glitter cats or rats, cover the whole cookie with black icing then cover with black sugar while still wet. Then tap off the excess. You can use a little round red sprinkle for the rat’s eye if you like but they look spooky without, so no worries if you skip the eye.

- If you’re making ghosts, cover the whole cookie in white and let dry overnight. The next day use an edible food marker, available in your supermarket’s baking aisle, to make smiley and spooky faces.

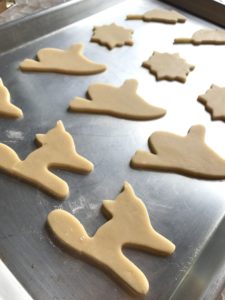
- Heed the directions. These sugar cookies are super buttery and have lovely crisp edges. Because of all that butter they need to be chilled in the fridge between cutting out and baking or they will lose their shape. If you can’t wait the full 15 minutes, you can put them in the freezer for 5-7 minutes instead.
- Bake one sheet at a time. This will give you the most consistent results. You want to bake them until the edges are just starting to brown, for me that’s right at the 11 minute mark but my oven is temperamental and trying to mentally break me. If you take them out too soon, they may get mushy when you add the moisture of the icing.
- Remember that they’re only cookies and that they will still taste good no matter how goofy they look. I get a kick out of making pretty things and taking pretty pictures and sharing on the interwebs. But cookies are meant to be eaten, not viewed, so just go for it.
Happy Halloween!

| Servings |
dozen
|
- 1 cups unsalted butter softened
- 1 cup sugar
- 2 eggs
- 1 teaspoon vanilla extract
- 1 teaspoon almond extract
- 1/2 teaspoon salt
- 1 teaspoon baking soda
- 3 cups all-purpose flour
- 1-2 containers white Betty Crocker cookie icing
- 1-2 containers black Betty Crocker cookie icing
- round red sprinkles optional
- black edible food marker
- black decorating sugar sometimes called sprinkles or sanding sugar
Ingredients
|
|
- In the bowl of your electric mixer (or with a hand mixer), beat the butter and sugar until light and fluffy (about 3 minutes). Add the eggs and vanilla extract and beat until combined. Add the salt and baking soda and beat to combine. Add the flour and beat until you have a smooth dough. Divide the dough in half and wrap each half in plastic wrap. Refrigerate for at least one hour, preferably overnight.
- Preheat oven to 350 degrees.
- Remove one half of the chilled dough from the refrigerator and, on a lightly floured surface, roll out the dough to a thickness of 1/4 inch (1 cm). (Keep turning the dough as you roll, making sure the dough does not stick to the counter.) Cut out your shapes and transfer cookies to baking sheet. Place the baking sheets with the unbaked cookies in the refrigerator for about 15 minutes to chill the dough which prevents the cookies from spreading and losing their shape while baking.
- Bake cookies for about 8-11 minutes (depending on size) or until the edges are just starting to brown. Remove from oven and let cookies cool on baking sheet for a few minutes before transferring to a wire rack to finish cooling. Frost with cookie icing then sprinkle with sanding sugar if using. Let ghost cookies dry for at least 4 hours before drawing on the faces with an edible black food marker. Be sure to let the icing dry at least 4 hours before storing.